
Keeping Cool: Understanding the Right Time to Defrost Your Chest Freezer
Are you a fan of frozen treats and deliciously chilled foods? Of course, we all love indulging in frozen desserts, but when storing them, it’s essential to have a chest freezer to keep them fresh and tasty. But did you know that your freezer also needs some TLC to keep it in top shape? Defrosting is one of the most crucial maintenance tasks for your freezer, and knowing when to do it is essential.
Defrosting your chest freezer not only helps to maintain its efficiency but also extends its lifespan. Unfortunately, ignoring this task can lead to a range of issues, such as reduced storage capacity, increased energy consumption, and even freezer burn on your precious goodies. But don’t worry; we’ve got you covered! In this blog post, we’ll help you understand when it’s the perfect time to defrost your chest freezer so that you can enjoy your frozen treats all year round.
So, grab a scoop of your favourite ice cream and settle in as we dive into the nitty-gritty of defrosting your freezer. We’ll cover the key factors you need to consider, including how often you should defrost, signs that it’s time to defrost and tips on how to do it like a pro. Trust us; you won’t want to miss this!
Why and When to Defrost Your Chest Freezer
Defrosting a chest freezer is an essential aspect of freezer maintenance. However, ice buildup can decrease the appliance’s overall efficiency, making it harder to keep the contents cool. Additionally, excess ice can make accessing and organizing your frozen items difficult, potentially leading to spoilage and waste.
Knowing when to defrost your chest freezer is crucial for proper upkeep. While the frequency of defrosting may vary depending on your specific freezer model and usage patterns, there are some general guidelines you can follow:
- Manufacturer’s Recommendations: Consult your chest freezer’s manual for the manufacturer’s suggested defrosting frequency. Most manufacturers recommend defrosting the appliance every six months to one year.
- Ice Buildup: Monitor the ice buildup in your chest freezer. If the ice is more than 1/4 inch thick, it’s time to defrost. Typically, a chest freezer will need defrosting when the ice reaches this thickness.
- Decreased Efficiency: If you notice your chest freezer is struggling to maintain temperature or if you experience a significant increase in energy consumption, it may be due to ice buildup and could be a sign that it’s time to defrost.
- Difficulty Accessing Contents: When accessing or organizing the items in your chest freezer becomes challenging, it might be time for a defrost session.
How to Defrost Your Chest Freezer Safely and Efficiently
Now that you know when to defrost your chest freezer, it’s essential to understand how to do it safely and efficiently. Following a proper defrosting process can help you avoid potential damage to your freezer and ensure that your frozen items are preserved. So let’s walk through some best practices for defrosting your chest freezer.
The defrosting process can take several hours, so it’s essential to plan ahead and have a suitable place to store your frozen items temporarily. Here are the steps to defrost your chest freezer:
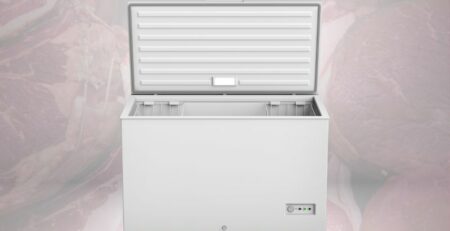
- Unplug and Empty: Unplug your chest freezer and remove all the contents. Store your frozen items in an insulated cooler or another freezer to keep them cold during defrosting.
- Remove Ice Buildup: Place towels or absorbent materials around the base of the freezer to soak up any water from the melting ice. Use a plastic scraper or spatula to gently remove the ice buildup, taking care not to damage the freezer’s interior.
- Speed Up the Process: Place a pot of hot water inside the freezer or use a fan to circulate warm air around the appliance to speed up the defrosting process. Avoid using sharp objects, hairdryers, or other electrical devices that may damage the freezer or pose a risk of electrocution.
- Clean and Sanitize: Once all the ice has melted, use a sponge or cloth to clean the interior of the chest freezer. Mix a solution of warm water and mild dish soap to remove any dirt or residue. After cleaning, sanitize the freezer using a solution of one tablespoon of unscented bleach mixed with a gallon of water. Wipe down the interior surfaces, then rinse with clean water and dry thoroughly.
- Restock and Plug In: Once the chest freezer is clean and dry, you can return your frozen items to the appliance. Organize your items for easy access, and be mindful of expiration dates. Finally, plug in the chest freezer and set it to the recommended temperature.
Conclusion
Defrosting your chest freezer is a critical aspect of maintaining its efficiency and prolonging its lifespan. By understanding how often you should defrost a chest freezer and following the proper steps for defrosting, you can keep your appliance running optimally and preserve the quality of your frozen items.
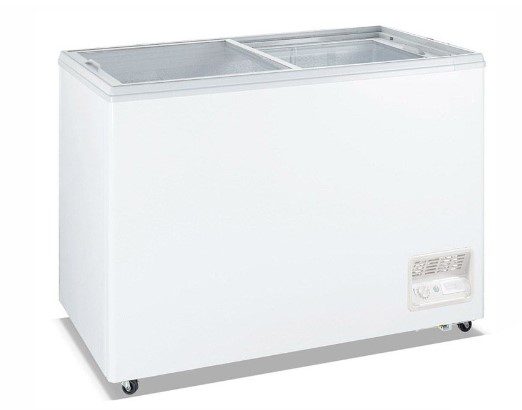
If you’re in the market for a new chest freezer, be sure to check out the chest freezers for sale in NZ. Keep a close eye on ice buildup and monitor the performance of your chest freezer to determine when it’s time to defrost. With proper care and maintenance, you’ll be able to enjoy an excellent and efficient chest freezer, providing you with delicious frozen treats and perfectly preserved food items. Happy defrosting!


Leave a Reply